More Guides
3D Printing: How to print a perfect first layer?
First layer is essential to get the your print stick to the bed or even prevent failures in later print.
Many people do not give enough attention to get the right first layer.
Once you do that, many of your problems will soon disappear and no longer waste filaments and have fun in 3d printing.
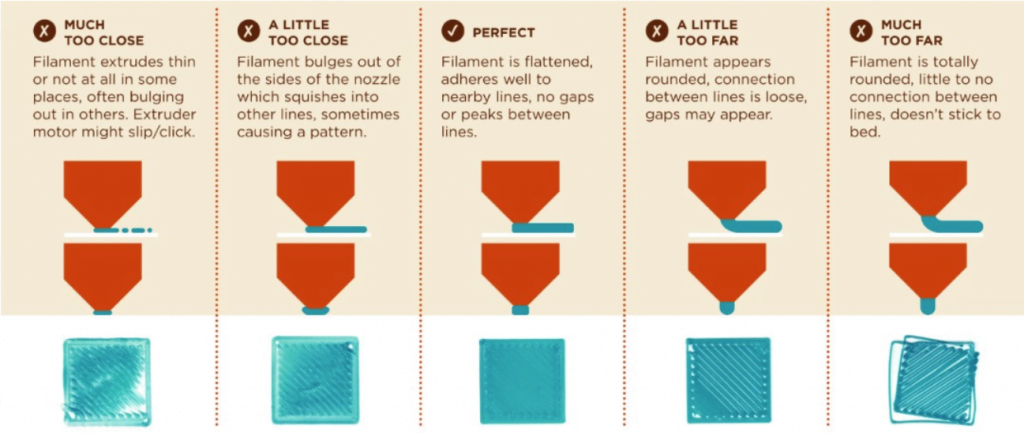
Tips for getting the perfect first layer
1.Well leveled X Gantry
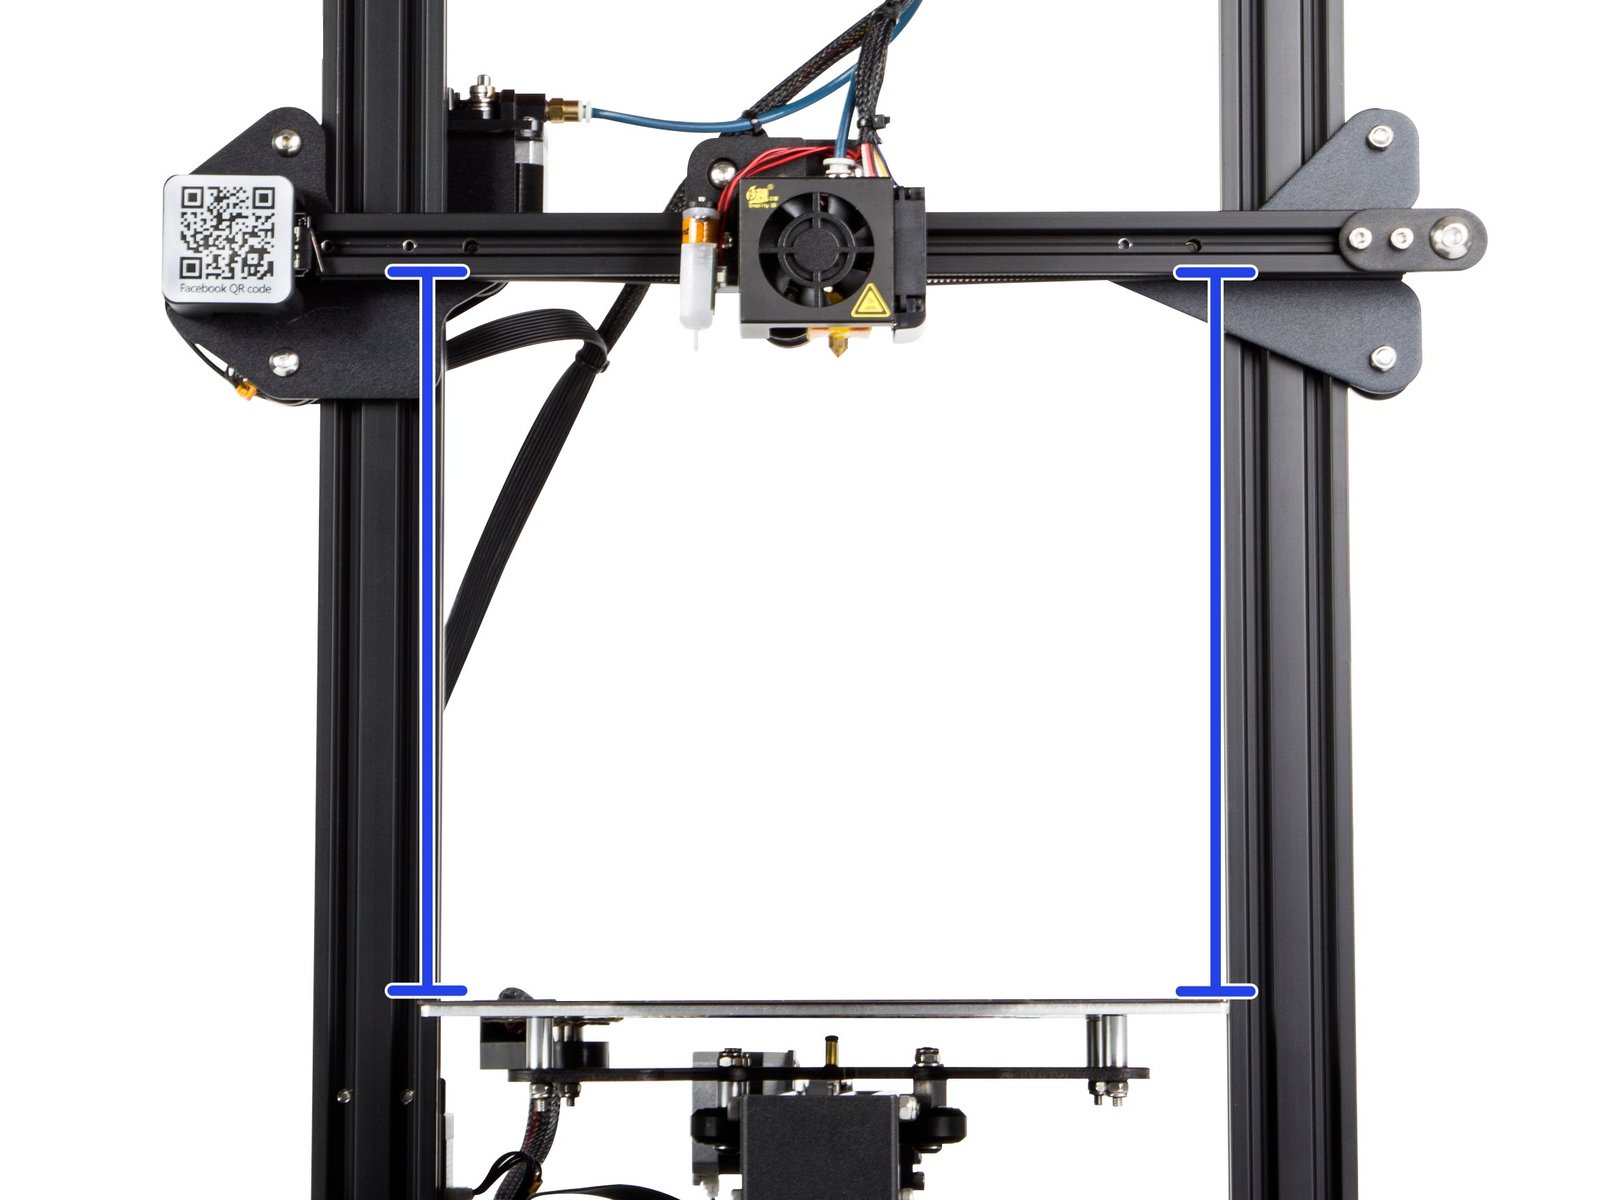
Make sure your X gantry is parallel to the bed and at 90° to your Z axis. You may think if you have an inclined X and you level the bed according to the X gantry may resolve your problem, but you will be printing all your models on an angle and will be getting a bad geometry models. It takes the time to set your machien correctly, need to loosen screws, retighten. It will make differences to your printer later! Check it out guide by Santube 3D
2. Clean your print surface
Every time after you print, filament residue may left on top of the surface, or if you touch the bed, your finger will leave some oil/grease that will contaminate the surface and will act as a barrier to weaken the adhesion. We recommend to keep a paper towel or Isopropy Alcohol bed cleaner next to your machine always part of your setup procedure. If the bed is too dirty, get soap and water to clean it up.
3. Flat Print Surface
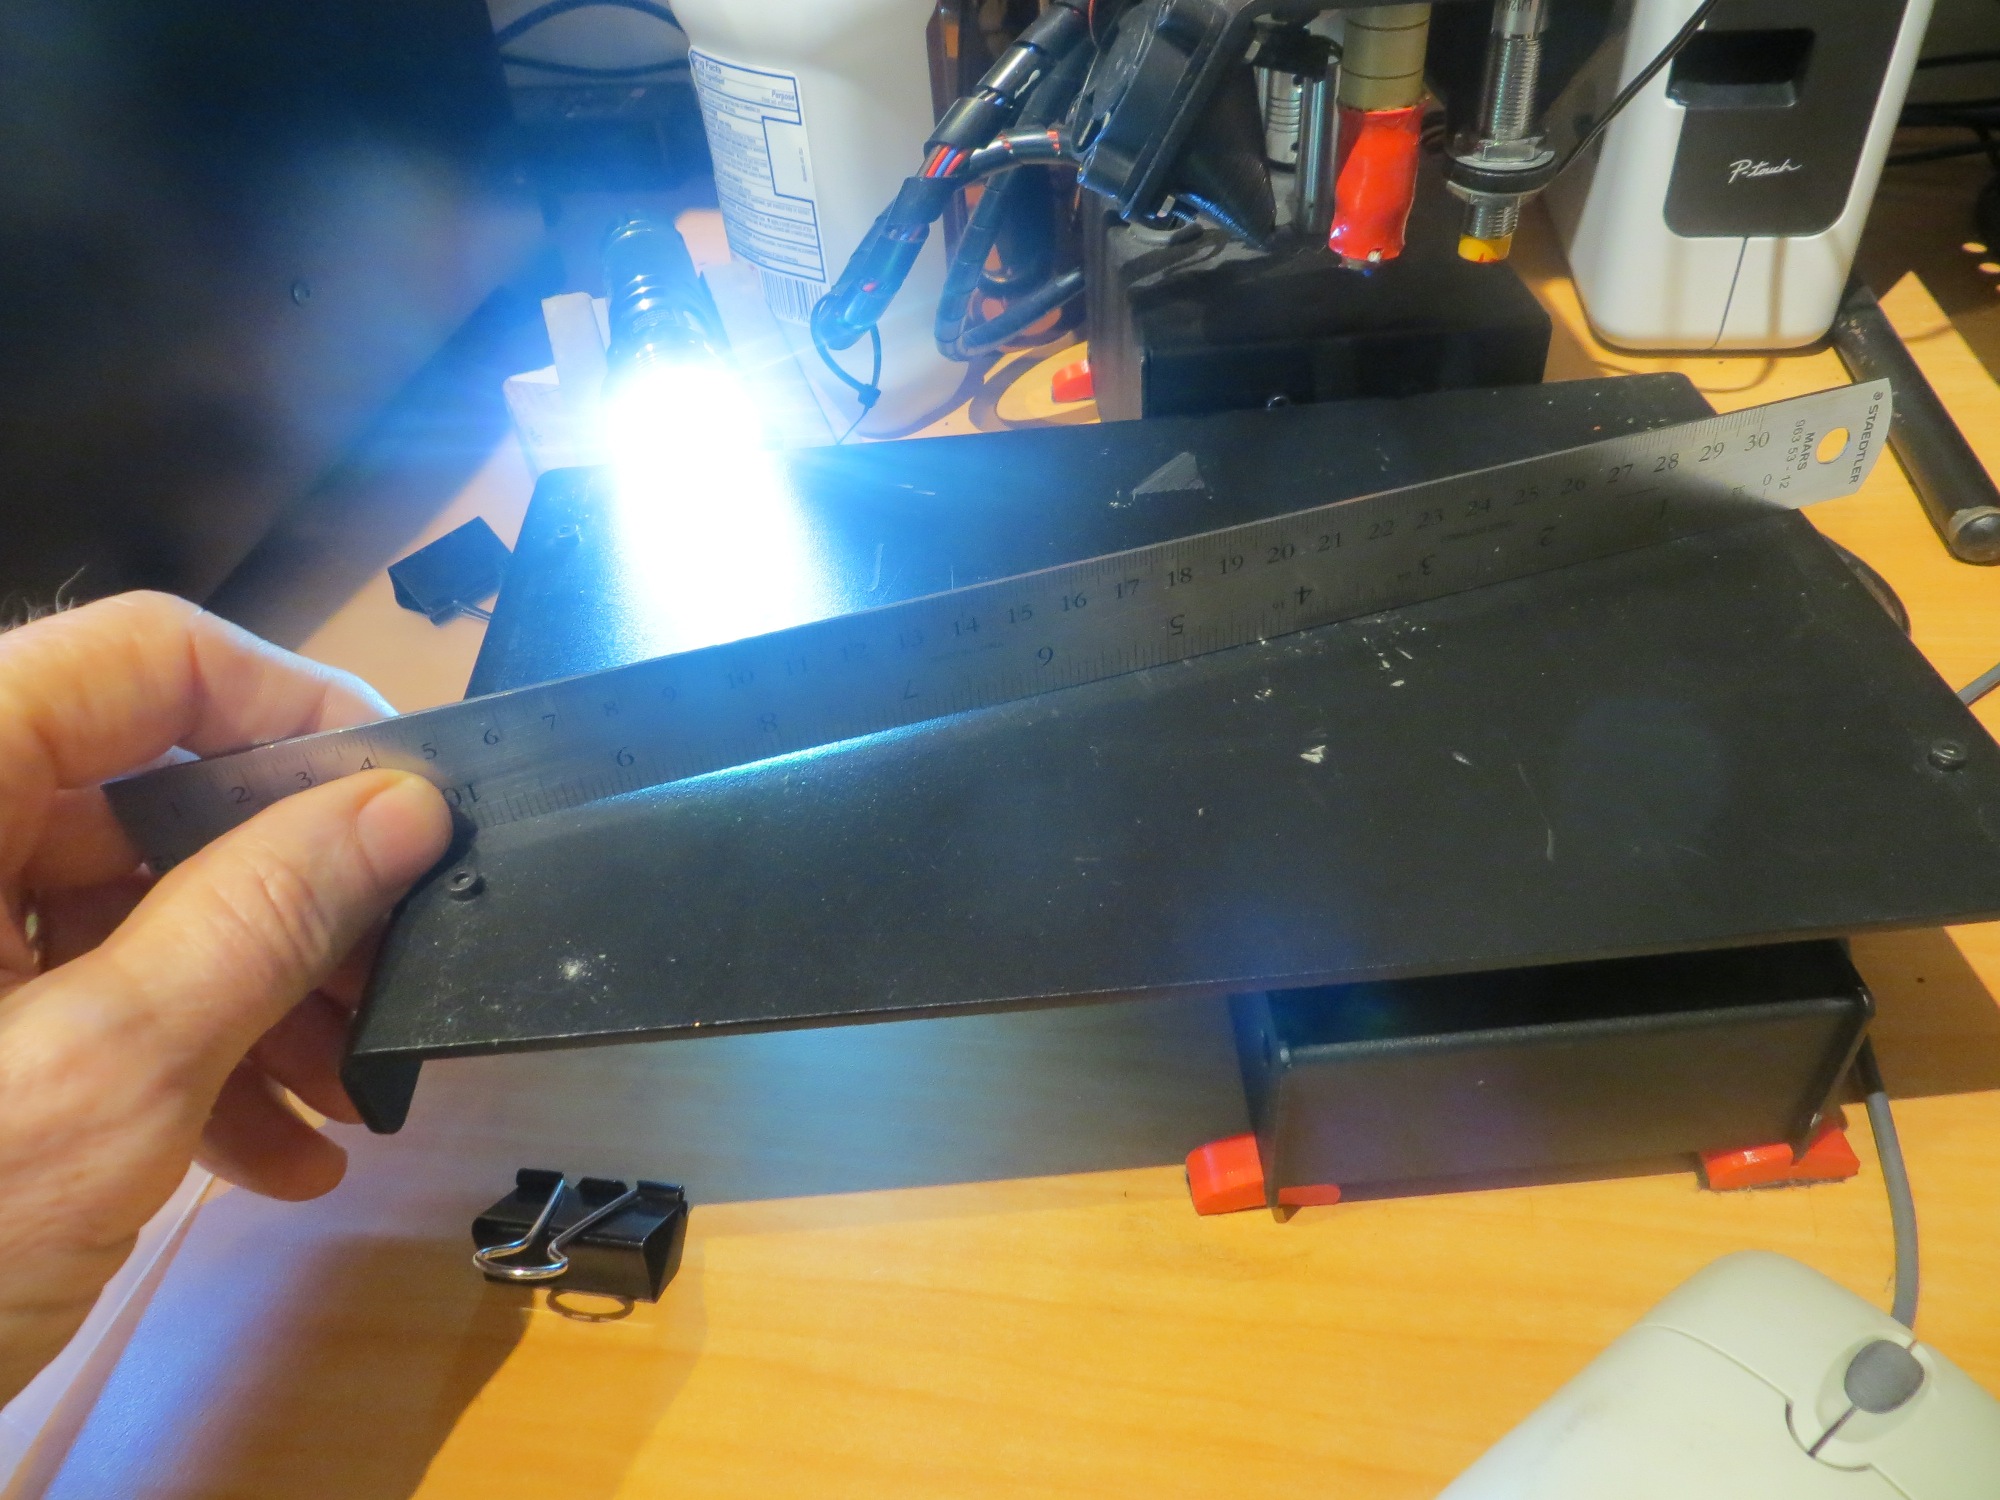
All kind of print bed has slight warp from +- 0.1mm to even higher. You may realized standard bed from Creality printer has lower or higher middle point compared to the corner due to the tension from bed spring. One way to check for flatness is to take an accurate steel ruler, put it accross the bed and get your eye down to the height of the surface, shine a light from the other side. If you see light shinning through then you have a bowed surface.
If you have bowed surface, do use thin aluminum stripes insert it very carefully between the build plate/glass bed and the heated bed.
4. Well leveled print surface
Level your bed with a good leveling program that stops right above each adjustment knob. Always level with nozzle and bed heated to desired print temperature as sometimes there may have residue reside on the nozzle.
Slowly adjust the heights, never move one knob too much as it may bend the bed!
Usually we are just using a piece of paper (70/80 microns) or feeler gauge (100 microns) to do leveling, until you can feel the right resistance between nozzle and bed, allowing you to push and pull it through without it bunching up. Keep doing it for all the corners until having the same resistance.
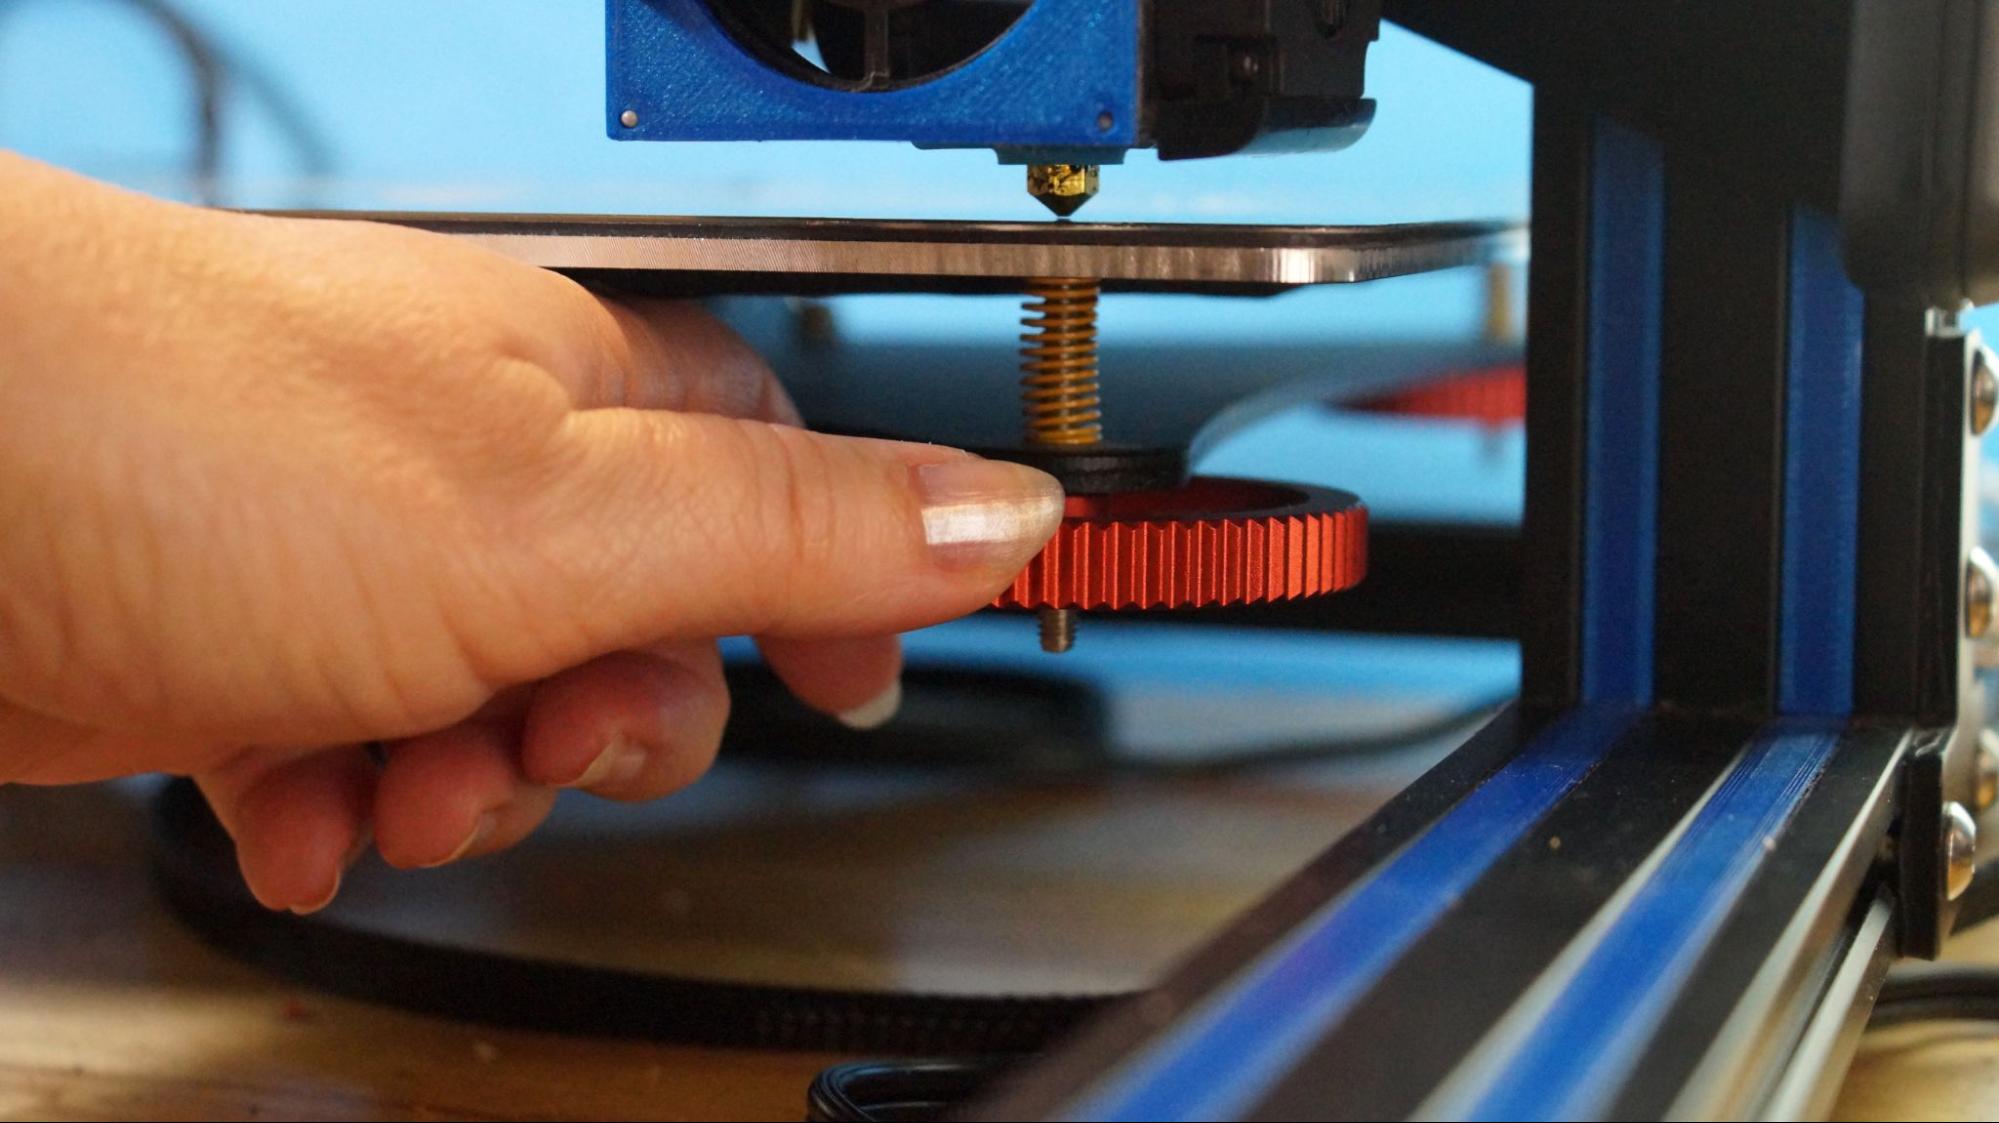
For ender 3 V2, do setup custom firmware like Jyers or Professional Firmware to get the manual leveling corner setting built-in. If you are using Ender 3 lcd12864 knob screen, use CHEP leveling.https://www.chepclub.com/bed-level.html
5. Gap Setting
Once you leveled well, do a live printing level. When print is started, take a look at the nozzle, make sure it’s stilling well. if it wasn’t, Press adjust and do an z offset compensation. to lower it down, usually just set z offset to negative value and vise versa.

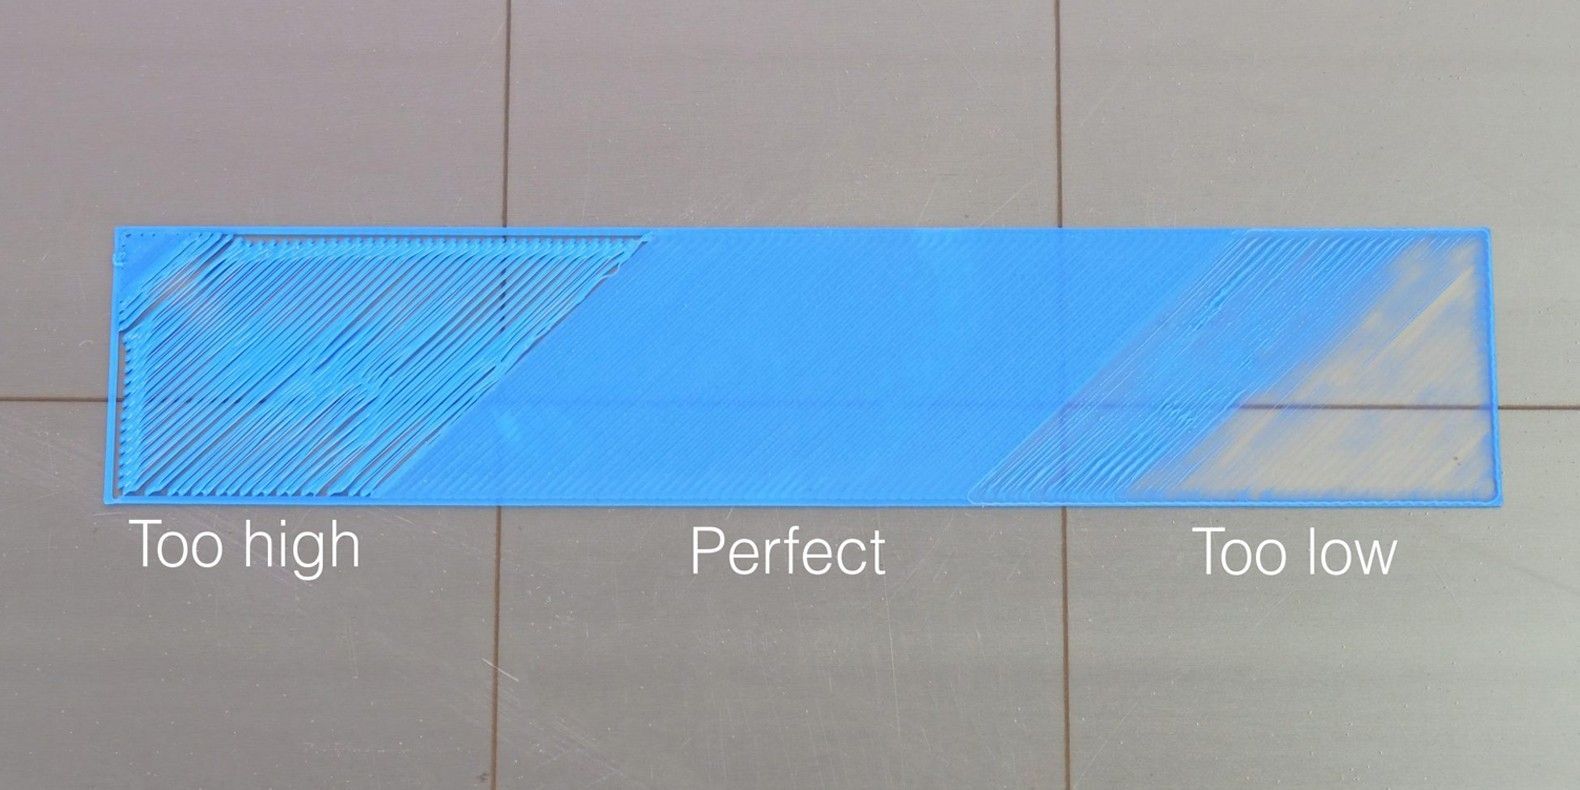
Remember there is no single measurement for the exact gap, this depends on the filament that you are using (e.g. PLA/ABS can be squished, PETG can’t squished else it will stick too well to the bed and causes the bed surface to peel off), it depends on your print surface material, nozzle size and also your feed rate. Get used to monitor your first layer and adjust it accordingly. It will gets very easy over time. However generally the first layer should be about 50% of your nozzle size, so if you are printing with 0.40 nozzle you may want to begin with a gap of about 0.20.
6. Right Print Surface
There are many options for a good print surfaces. You can use glues, hair spray or even painter tape to help your filament sticks. Most of the time you don’t need them once you follow the right steps, and getting rid of these may speed up your clean up and preparation time for your next print.
PEI flexible plate is an very popular build surface which has many features and properties that make it an idea choice for your 3D Printer. It helps stick really well especially PLA & PETG. Flex a little and the printer is released ABS is fine but if you heated it up to 110C, the magnetic may weakness thus need to use binder clip to clip the flexible plate
Glass bed is good most surface as it has the best flatness and has high temperature resistant. but it may takes longer time to heat up compared to PEI, harder to remove the print (some print may need to use scraper), if you are getting little warping, just apply thin layer of glue stick and it will be perfect.
6. Bed temperature and print speeds
Make sure you have heated your bed to the recommended temperature for best adhesion. lower down your bed fans for initial layers so it will fuse down to the bed nicely. and also LOWER your initial layer speed. Go as slow as you can for your first layer. Normally I did it with 20mm/s, so it will stick well and the nozzle won’t be dragging the filament around..
This page referenced from cult3d and improved accordingly based on author experiences.
